Nets, those humble yet intricate creations of woven rope, have served humanity for millennia. From fishing and hunting tools to cargo restraints and even safety equipment, their versatility is undeniable. But have you ever wondered how these seemingly complex structures come to life? Well, wonder no more! This guide delves into the world of net weaving, equipping you with the knowledge and skills to craft your own net using readily available materials.
1. Choosing Your Weapon: Rope Selection
The foundation of any good net is the rope itself. Here's what to consider when selecting your rope:
- Material: Natural fibers like cotton or hemp offer a traditional feel but may not be as strong or weatherproof. Synthetic options like nylon or polyester are generally stronger, more durable, and resistant to rot and mildew.
- Thickness: Thicker rope creates a more robust net, but it can also be heavier and more challenging to work with. For beginners, a medium-thickness rope (around 6-8mm diameter) is a good balance.
- Length: The length of rope you need depends on the desired size of your net. Aim for a length twice the net's intended width for basic techniques.
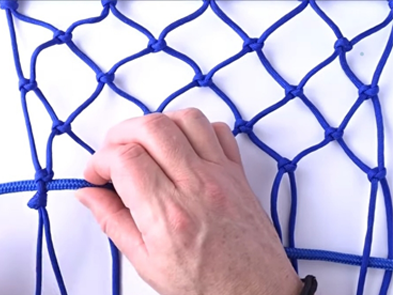
2. Netting Techniques: Unveiling the Craft
There are various net weaving techniques, each with its own advantages and complexity. Here, we'll explore two popular methods:
2.1. The Simple Net with Overhand Knots
This is a beginner-friendly technique that yields a sturdy net suitable for catching light objects or practicing your skills.
Materials:
- Rope (length: twice the desired net width)
- Scissors
Steps:
- Prepare the Rope: Cut your chosen rope to the desired length.
- Create the Starting Row: Fold the rope in half and form a loop at the folded end. Secure this loop with an overhand knot.
- Build the Rows: Hold the rope taut and measure equal distances down its length. At these intervals, form loops of consistent size by bringing the rope up and over your thumb. Secure each loop with an overhand knot tied around the main rope.
- Connect the Rows: Once you have your first row of loops, take the dangling end of the rope and tie it to a corresponding loop in the row above, using another overhand knot. Repeat this process along the entire first row. Then, move down to the next loop on the main rope and begin a new row by tying it to the secured loop above.
- Continue Weaving: Repeat steps 4 and 5 until your net reaches the desired length.
Tips:
Maintain consistent tension as you work to ensure a uniform net.
Use a ruler or other measuring tool to ensure even spacing between loops.
Practice makes perfect! Don't be discouraged if your first attempts aren't flawless.
2.2. The Net with Crown Knots
This technique creates a more intricate and stronger net, ideal for heavier objects.
Materials:
- Rope (length: twice the desired net width)
- Shorter piece of rope for the "standing line" (length: approx. the net's depth)
- Scissors
Steps:
- Prepare the Rope and Standing Line: Cut your main rope to the desired net width (twice the width) and tie one end to the shorter standing line, forming a secure loop.
- Make the Starting Crown Knot: With the longer rope as your working end, hold the standing line taut and wrap the working end around it once. Then, pass the working end under the standing line and up through the loop you just created. Pull tight to form the first crown knot.
- Continue Crown Knots: Repeat step 2, making successive crown knots around the standing line. Keep the knots close together, ensuring a tight and even pattern.
- Build the Rows: Continue making crown knots, working your way down the standing line until you reach the bottom. Secure the working end by tying it to the base of the last knot.
- Create New Rows: Start a new row by attaching the working end of the rope to a secure knot in the row above. Repeat steps 3 and 4 to build subsequent rows.
- Finishing Touches: Once your net reaches the desired length, tie off the working end securely. You can also add a finishing knot or braid at the edges for a more polished look.
Tips:
- Mastering the crown knot may take some practice. Refer to visual guides or video tutorials for a clearer understanding [YouTube crown knot net].
- Maintain consistent tension on both the working end and the standing line for a neat and sturdy net.
- Consider using different colored ropes to create a visually appealing net.
3. Beyond the Basics: Exploring Advanced Techniques
While the methods above provide a solid foundation for net weaving, the world of net making offers a vast array of techniques for creating specialized nets. Here's a glimpse into some exciting possibilities:
3.1. Square Mesh Net
This net utilizes a grid-like structure with square openings, commonly used for fishing nets and cargo nets. Mastering this technique requires a netting needle, a specialized tool that aids in forming the square meshes.
Materials:
- Fine to medium-thickness twine or rope
- Netting needle
- Scissors
The basic principle involves creating a series of loops and interlinking them using the netting needle. The specific method can vary depending on the desired mesh size and net complexity. Resources like online tutorials and specialized books can provide detailed instructions for creating square mesh nets.
3.2. Knotless Net
This innovative technique dispenses with knots altogether, relying on a series of interconnected loops to form the net. This method results in a lighter and more flexible net, making it ideal for catching smaller fish or creating decorative nets.
Materials:
- Thin, strong twine (nylon or polyester)
- Netting shuttle (optional, can be improvised with a dowel)
- Scissors
The knotless net relies on a series of interlocking loops created with the twine. The netting shuttle, if used, helps maintain tension and create consistent loops. Learning resources like video tutorials can provide a visual demonstration of this technique.
3.3. Decorative Netting
Net weaving isn't limited to functional purposes. Decorative netting can add a touch of nautical charm to your home or create stunning artistic pieces. This opens doors to experimentation with different colors, textures, and even incorporating beads or other embellishments.
Materials:
- Rope or twine in various colors and thicknesses (optional)
- Beads, shells, or other decorative elements (optional)
- Scissors
Here, you can unleash your creativity! Utilize the basic techniques learned above or explore variations for creating decorative patterns. Online resources provide inspiration and guidance for crafting beautiful decorative nets.
4. Netting Wisdom: Tips and Tricks for Success
As you embark on your net weaving journey, here are some helpful tips to keep in mind:
- Start simple: Begin with the basic overhand knot net to get comfortable with the concept and practice your knotting skills.
- Practice makes perfect: Don't be discouraged if your initial attempts aren't perfect. The more you practice, the smoother and more efficient your weaving will become.
- Maintain tension: Consistent tension throughout the weaving process ensures a uniform and sturdy net.
- Use the right tools: While basic nets can be made with just rope and scissors, a netting needle can be invaluable for creating square mesh nets or intricate patterns.
- Find inspiration: Explore online resources like tutorials, books, and forums to discover new techniques, net designs, and creative applications.
Experiment and have fun! Don't be afraid to experiment with different colors, materials, and techniques. The possibilities with net weaving are endless!
With dedication and a touch of creativity, you can transform simple rope into a functional or decorative net, adding a new skill to your repertoire and perhaps even catching a fish or two along the way. So, grab your rope, unleash your inner artisan, and get weaving!